Creative Corners: Transforming Your Room into a Fun-Filled Learning Lab
When you were a kid did you ever try to paint a masterpiece on your wall with crayons only to be reprimanded by your parents?
Okay, now here’s your chance at fulfilling that dream.
And this time, not only will your parents be proud of you, they might even join in.
Because your next masterpiece is something that is going to make everyone happy – your parents, your teachers, and you.
What if I told you that your room is a blank canvas for creativity and learning? The walls of your room can become a vibrant carousel and make your lessons come alive.
So, let’s take a look at some fun, practical strategies that can help you see your study sessions in a whole new light (of your room).
Quick tip: The objective of these activities is to make learning fun, not tiresome. Feel free to change the techniques provided below to fit your style! Your involvement in figuring out the best way possible for you is what will make this way of learning highly effective.
1. Mind Maps
A mind map is a visual representation of information, branching out from a central idea to cover related topics, facts, and ideas.
Things you will need:
- A4 sheets / Chart Paper (you can use bigger/smaller sheets as per your need)
- Sketchpens / Colour Pencils (something to color the shapes)
- Black / Dark coloured Marker/Sketch Pen
- Tape / Pins to stick it to your Wall / Board

Draw a mind map like this one given above. Start from the center and make the yellow box first. This will represent the Core or Central concept that we are trying to memorize. Then branch out to the pink boxes, then the greens, and then finally, the blue ones. At the moment, the mind map is empty. Why don’t we pick up a simple topic from ‘Physics’ and see how a mind map can be made with it? Take out a piece of paper and draw along the steps!
How to Do It:
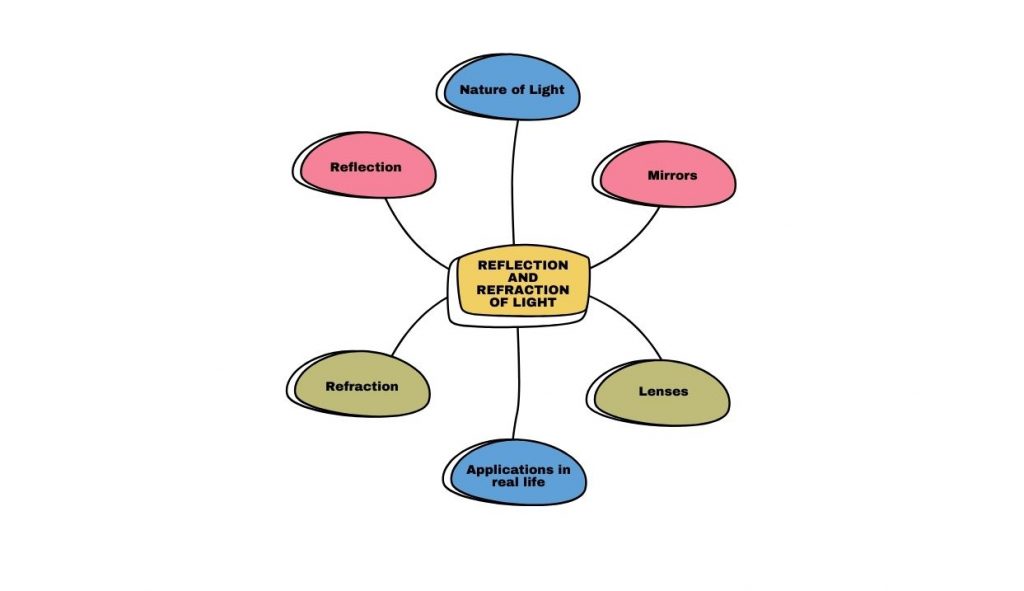
Step 1: For the Core or Central Concept, let’s take up “Reflection and Refraction of Light” as our Central Topic. Write it in the yellow box in the center.
Step 2: Now pick the first thing you would like to remember about the concept. For example, the first thing we must know in the concept “Reflection and Refraction of Light” is “What is light? What is its nature?”. Let’s write that down in the top blue box.
Step 3: Next, define what “Reflection” is. So, write “Reflection” in the left pink box.
Step 4: Another thing you need to know about reflection is how it occurs and on what surface. You need to know about the different types of mirrors. Write “Mirrors” in the right pink box.
Step 5: Now, you need to define “Refraction”. You also should know what surface it occurs on. So, you have to know about different types of lenses too. Let’s write “Refraction” on the left green box and “Lenses” on the right green box.
Step 6: Finally, you need to understand the real-world applications of these concepts. So, let’s write that in the bottom blue box.
If you look closely, the same coloured boxes have similar information – the blue boxes have broad topics, pinks are related to each other, and then so are the greens. Overall, everything ties into the central concept – Reflection and Refraction!
Take a look at the final Mind Map below.
Now, this paper can be pasted on your wall so you can see it every day! Not only does it help you remember the concept better, but you have to agree with me, it does add a pop of color to those walls, doesn’t it?
You can pick any concept from any subject at all. Mind maps are versatile and can be molded to your needs. In fact, you can do a quick Google search and view how different people make their mind maps to take inspiration.
2. Flashcards
Flashcards are small cards with a question in the front and its answer on the back. They are used to test and improve memory. You must have come across these in many of your school games/quizzes or maybe some of your teachers use them in classrooms, too. If you make use of Flashcards while studying then, well, you’re a step ahead already!
Things you will need:
- Chart Paper / A4 sheets (you can use bigger/smaller sheets as per your need)
- Sketchpens / Colour Pencils (something to color the shapes)
- Black / Dark coloured Marker/Sketch Pen
- A ruler
- Scissors
- Tape / Pins to stick to your Wall / Board
How to Do It:
Step 1: Cut chart papers/normal papers in square, rectangular, or any shape that you like. The more creative and fun it is for you, the better. Try to make sure that you have some distinction between the front and the backside of the paper. For example, it might be blue on one side and white on the other or you could color one side and keep the other plain.

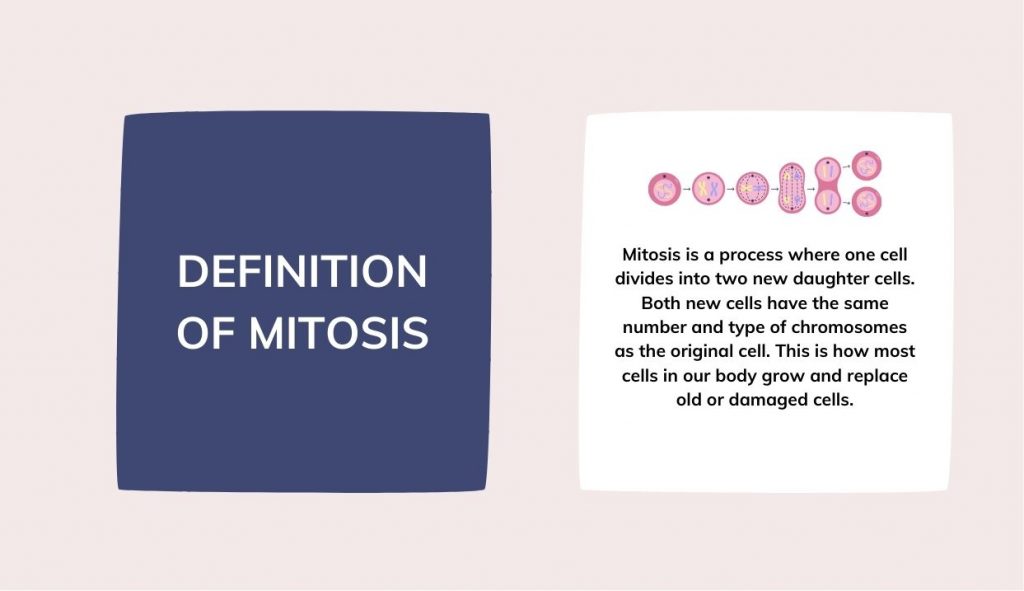
Step 2: Pick the questions you want to test yourself for. For example, you might want to remember the definition of Mitosis, the characteristics of Carbon, the year the second World War came to an end, etc. It could be anything at all.
Step 3: Now comes the fun part – you have to write down your questions on one side (say, the blue side) and their answers on the other (the white). All the questions should be on the coloured or the same side of the paper. Why? This is because your brain will associate all the questions with the blue side and the answers with the white side!
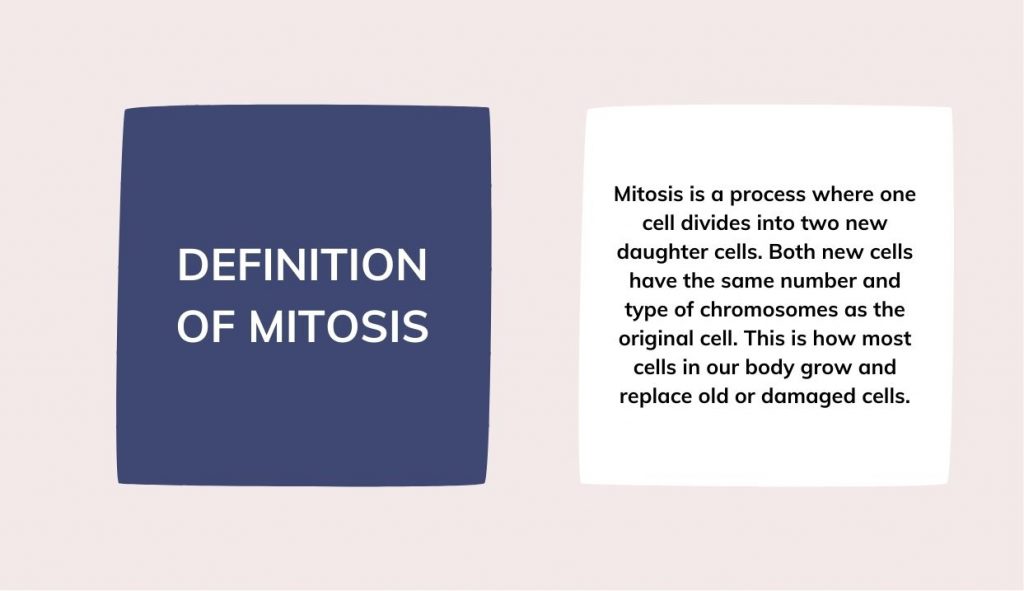
Step 4 (optional, but effective): Now, this step is optional but definitely recommended. It’s an effective way to tap into your associative memory and memorize better. For the answers, it might be useful to also draw a symbol or a diagram that helps in reminding you the points of the answer. Sometimes, when you associate a symbol or a diagram with a concept, it helps you recall the answer faster.
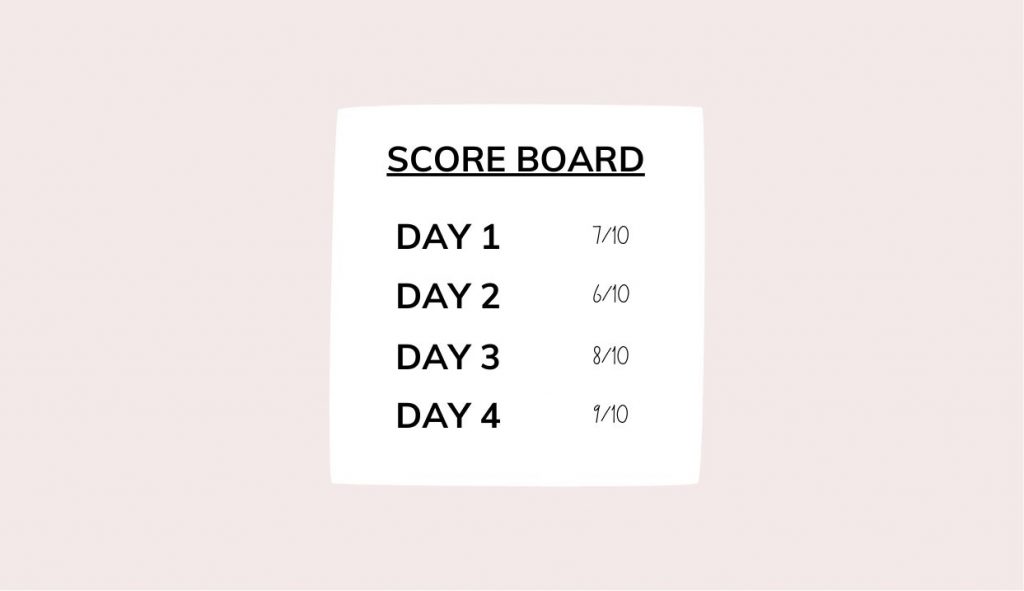
Step 5: Test yourself! Make a personal score-board for yourself and paste it on your wall. Write down how many you get right every day and track your progress.
You will be surprised to see the results as you keep practicing!
3. Timeline Construction
Stories in History are fun, but the dates? Not so much. Building a timeline helps visualize the sequence of events, making historical periods or processes easier to remember. This is an extremely useful technique to remember the millions of dates that you have as part of your Social Science subjects (and impress your classmates and teachers).
Things you will need:
- Chart Paper (preferred, you can use a smaller paper as well)
- Sketchpens / Colour Pencils (something to color the shapes)
- Black / Dark coloured Marker/Sketch Pen
- A ruler
- Scissors
- Tape / Pins to stick it to your Wall / Board
How to Do It:
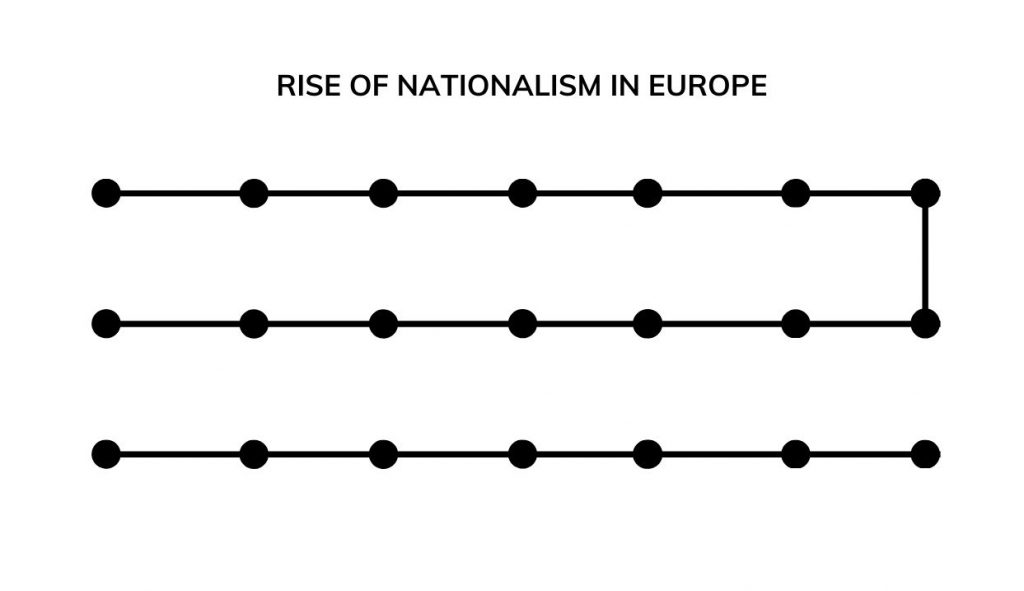
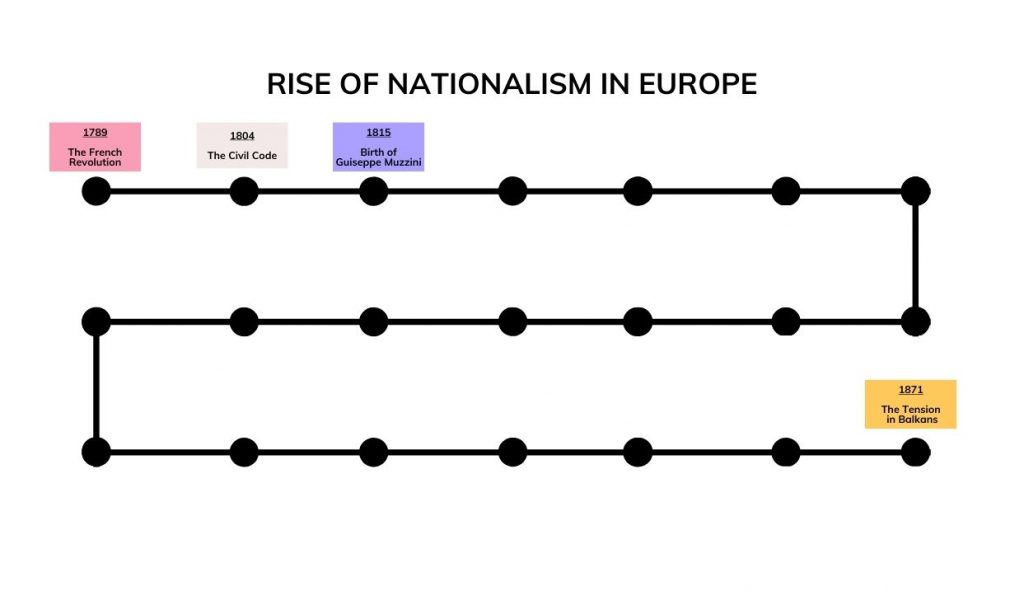
Step 1: Draw a timeline on a piece of chart paper. It’s better to use a big chart paper so that you have ample space to even add the details of the event. However, it is fine if you’d like to use a smaller paper to stick on your wall. Draw a timeline in whichever way you feel is comfortable. There’s one given below as a reference for “Rise of Nationalism in Europe”, but it is still advisable for you to follow a design that is easier to follow for you.
Step 2: Write down key events, discoveries, or figures at their corresponding points on the timeline. Use different colors or symbols for different types of events or themes. You can also doodle around it or paste pictures that can relate to the event!
Step 3: Hang your timeline where you can see it for daily review.
Step 4 (optional): Make Flashcards for this timeline too. It would be a great way for you to test whether this timeline chart is helping you or not.
If you paste these charts or flashcards on your wall/board, you’re memorizing better because your spatial memory is being used as well. Every time you’re out of the room, you will still be able to close your eyes and visualize what space the chart occupied in your room and which date was written on what end.
4. Homigram (on paper)
Your best friend was away from school for a few days and missed all the action. When they come back, you have to give them a full download of everything that went down in chronological order. No detail shall be left out.
What if the person writing your History book felt the same way? Maybe they are just really passionate about Napoleon and want to tell you everything in chronological order! Even if that isn’t the case, imagining all your lessons as exciting stories does make it sound more interesting, right?
Thinking of your lessons as stories forces you to use your Visual, Associative and Spatial – VAS memories. Homigrams are the perfect way to use these VAS memories. Homigrams are picture stories that help you memorize your lessons through fun stories. How, let’s read on!
Things you will need:
- Chart paper / Canvas / Paper (anything you would like to paint on)
- Sketchpens / Colour Pencils / Paint
- Large printout of the background you choose
- Print out / Cut outs of images you’d like to paste
- Scissors
- Black / Dark coloured Marker/Sketch Pen (to add any text)
- Tape / Pins to stick it to your Wall / Board
How to Do It:
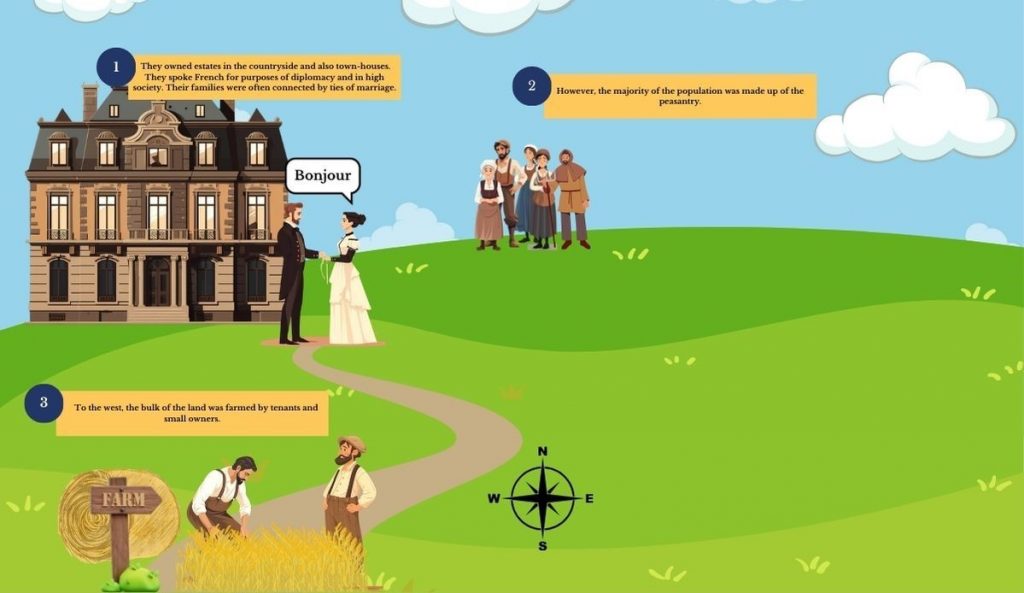
Step 1: Think of a concept you would like to create a picture story for. Let’s take “The Aristocracy and the New Middle Class” from the History Chapter “Rise of Nationalism in Europe”.
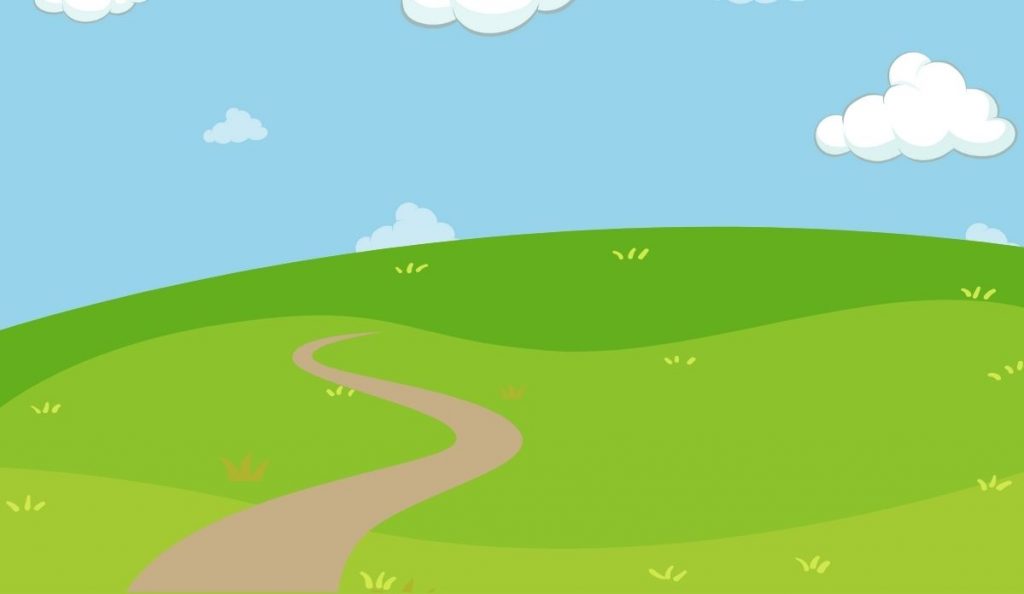
First, read the whole section and try to visualize a setting in which the entire scenario is taking place. So, let’s keep it easy for now and think of the setting as a vast field in 19th Century Europe. Find a good image that fits your imagination and print it out. An example is given below.
Step 2: Now, visualize each point separately. The first point is –
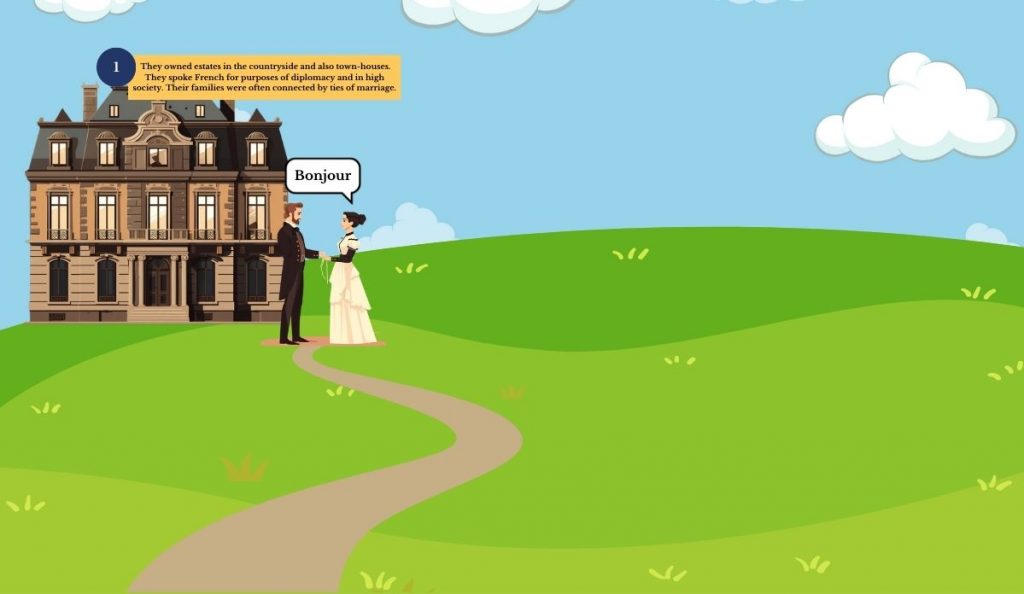
They owned estates in the countryside and also town-houses. They spoke French for purposes of diplomacy and in high society. Their families were often connected by ties of marriage.
How can you create a picture for this?
Well, think that you are telling your friend a story. James, the town’s rich, arrogant heart-throb, owns a big townhouse in the corner. He married Marie, another rich, beautiful woman in the countryside who speaks French. It’s such a convenient marriage – both rich, good-looking, and with their cool French accents and perfect “r” pronunciations that one can never perfect.
Now, while the story’s clear, let’s think about how it looks visually. There could be a big European style house. A couple standing in front of it to indicate how aristocrats were bound by ties of marriage and they’re talking to each other in French! You can print out these images or cut them out from magazines or newspapers. You can even draw them by hand if you love drawing!
Similarly, for the second point –
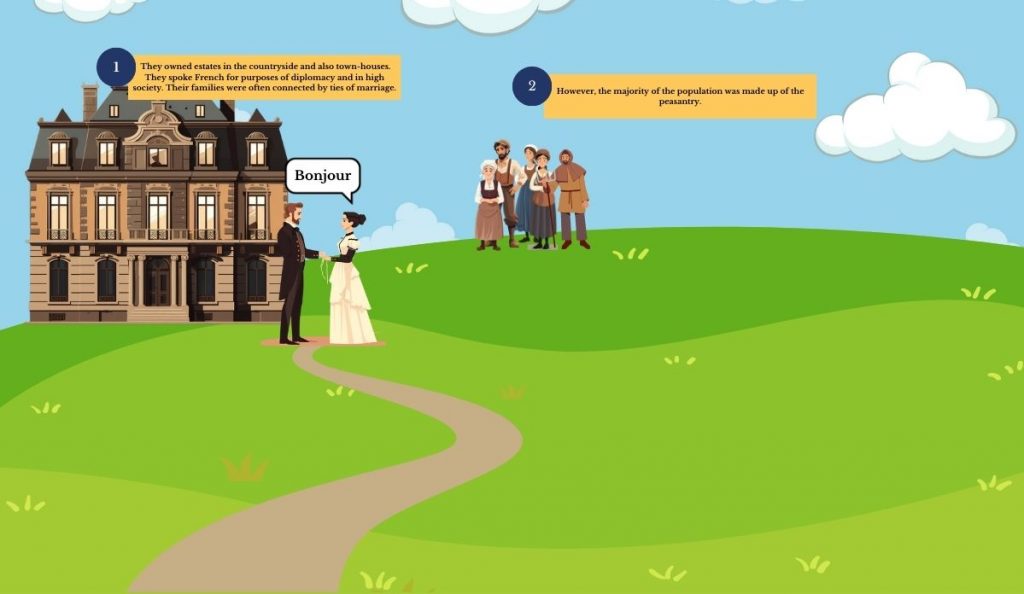
However, the majority of the population was made up of the peasantry.
Now, while James and Marie are so rich, there are so many poor people around the countryside. The rich are happy in their big townhouses but no one cares about the poor! How horrible!
Visually, one could imagine a group of poor peasants standing away from the house looking sad and distraught. They weren’t invited to the wedding but they could see and wish for better days from afar.
For the third point –
To the west, the bulk of the land was farmed by tenants and small owners.
While the rich are comfortable and enjoying their lavish dinner. Have they wondered where it comes from? Of course not! They’re so entitled and ignorant! There are so many tenants and small owners working day and night to grow produce!
Now visually, how do you indicate that something’s on the east or west?
Let’s get creative here. First, you can imagine tenants/small owners farming. Place the visual on the left bottom of the screen. Then, to indicate it’s the west, add a compass beside it!
Finally, for the fourth point –
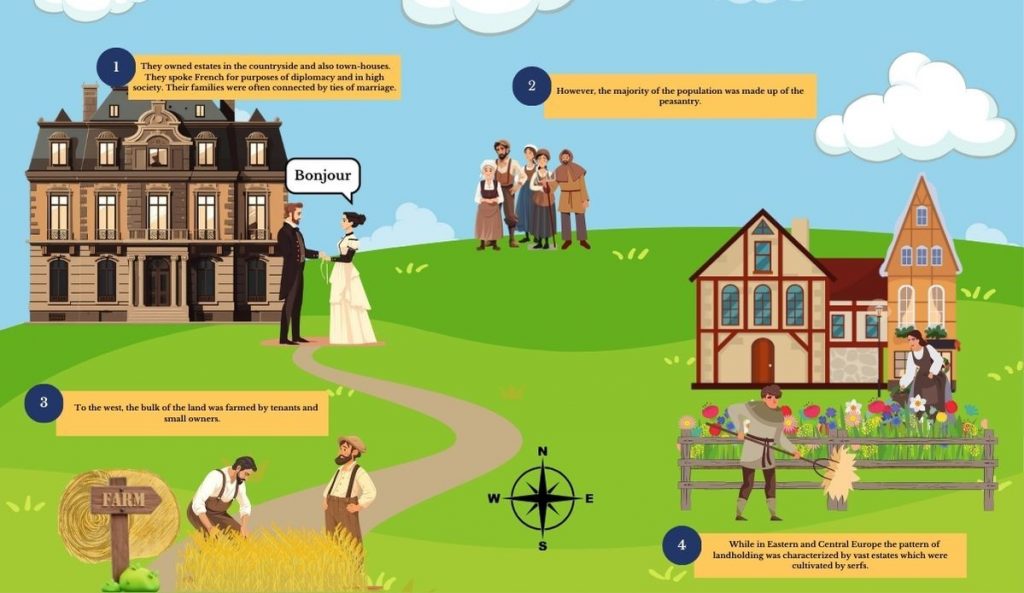
While in Eastern and Central Europe the pattern of landholding was characterized by vast estates which were cultivated by serfs.
The rich also owned big estates. Probably James and Marie’s vacation home. But who takes care of that home? Serfs! Cleaning their home, taking care of their big beautiful gardens, and clearing the lawn all day.
But how do we show this visually now?
Since there’s already a compass indicating it’s east, you only need to think of a befitting visual. What can it be?
Well, you could show a big estate with ‘serfs’ taking care of the lawn!
Interesting, isn’t it? You can think of ideas for the rest of the topic, search for the right pictures online or from newspapers, and paste cut outs on a chart paper to look like a beautiful picture story called Homigram!
You don’t have to paste only graphics or full scenes – you can make a collage of images (real or graphic) that remind you perfectly of the topic you’re trying to learn. A Homigram is a new, creative, and impactful technique to use your VAS memories effectively. It turns your learning into fun stories that are developed by you and because they’re developed by you, they stick to your memory!
5. Diorama
A diorama is a three-dimensional model representing a historical scene, ecosystem, or scientific concept. This may not be easy-to-do for all your lessons, but can be a fun exercise for something that’s really difficult or that interests you! In fact, you could even discuss this with your classmates and teachers to make this a class activity. This diorama then can be kept and used for years on end to teach the concept in class!
Things you will need:
- Chart paper / Canvas / Paper (anything you would like to paint on)
- Sketchpens / Colour Pencils / Paint
- Large printout of the background you choose
- Print out / Cut outs of images you’d like to paste
- Thermocol / Cardboard used to make pictures look 3D
- Scissors
- Black / Dark coloured Marker/Sketch Pen (to add any text)
- Tape / Pins to stick it to your Wall / Board
How to Do It:
You can create a diorama exactly as you created the Homigram. Only, this time in 3D! Make the characters and items stand using thermocol or cardboard and make the story come alive.
6. Creating a Song/Poem
Have you ever had a horrible song stuck in your brain playing in a loop? You hate it but you still remember most of the lyrics. It’s insane! But, that’s the magic of rhythm and rhyme! Turning information into a song or poem makes it easier to remember. Yes, you probably don’t want to sing songs about Carbon but well, it’s better than losing those 5 marks in the exam, isn’t it?
Things you will need:
- A laptop with a functioning internet connection
- The content you’d like to turn into a song
- Your creativity!
How to Do It:
Step 1: Choose a chunk of syllabus content you find hard to memorize.
Step 2: Now here’s where we’re going to ask AI for help. Open up ChatGPT, provide the content for the concept you want to memorize through a poem and state – “Turn this into a short poem that can help me remember these points better”. You can ask ChatGPT to change it as per your requirements.
Step 3: Once you’ve got the poem – you can sing it, recite it, or rap it! Before you know it, you’ll remember all the characteristics of Carbon!
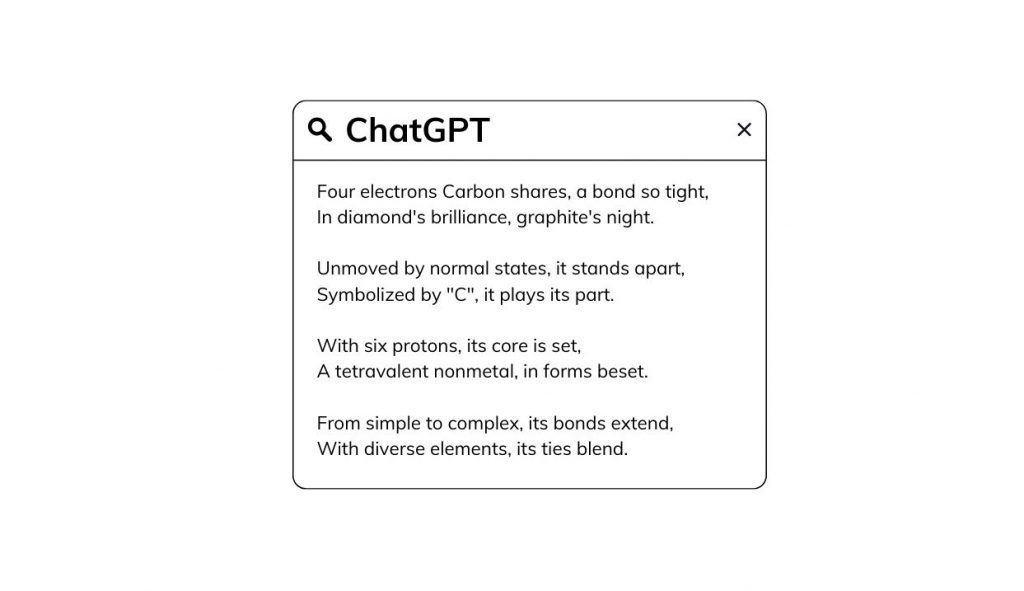
To all the musicians out there, ChatGPT can also give you basic chords to turn this into a song.
Verse 1:
- C (Four electrons Carbon shares, a bond so tight,)
- Am (In diamond’s brilliance, graphite’s night.)
- F (Unmoved by normal states, it stands apart,)
- G (Symbolized by “C”, it plays its part.)
Verse 2:
- C (With six protons, its core is set,)
- Am (A tetravalent nonmetal, in forms beset.)
- F (From simple to complex, its bonds extend,)
- G (With diverse elements, its ties blend.)
Why don’t you try this and tell us if ChatGPT can create beautiful music now? Or perhaps, why don’t you try to find a better chord progression and share your creation with us!
Next time you’re faced with a daunting study session, remember that with a little creativity, you can transform your learning experience into something not just productive, but also enjoyable.
7. Doodle It
Doodling isn’t just a way to pass the time during a dull lecture. It’s a powerful tool to make complex ideas easier to grasp and remember. By turning the concepts you’re trying to learn into simple doodles, you’re not just making studying fun but also tapping into your brain’s visual processing power.
Things you will need:
- A4 sheets (you can use bigger/smaller sheets as per your need)
- Sketchpens / Colour Pencils
- Tape / Pins to stick it to your Wall / Board
How to Do It:
Step 1: Choose a topic that you find tricky to remember. It could be anything from scientific processes like photosynthesis to historical events.
Step 2: Identify key elements or steps within the concept. For example, for photosynthesis, you might doodle the sun, a leaf, and then oxygen and glucose molecules.
Step 3: On a blank sheet, start drawing simple representations for each part of the concept. Don’t worry about your artistic skills; the goal is to create visual cues that trigger your memory.
Step 4: Beside each doodle, write a brief note or keyword. This will help reinforce what each image represents. Color code the doodles if you want. For example, the definitions could be blue, characteristics yellow, and so on – this will help in categorizing information well.
Step 5: Place your doodle sheet somewhere you can see it often. Put it up on a board or your wall. Every time you glance at it, try to recall the concept and explain it to yourself using the doodles as prompts.
8. Paint It
Painting takes doodling one step further. It involves using colors, shapes, and textures to represent and memorize your study material. This method is especially effective for visual learners who enjoy art and creativity.
Things you will need:
- Chart paper / Canvas / Paper (anything you would like to paint on)
- Sketchpens / Colour Pencils / Paint
- Black / Dark coloured Marker/Sketch Pen (to add any text)
- Tape / Pins to stick it to your Wall / Board
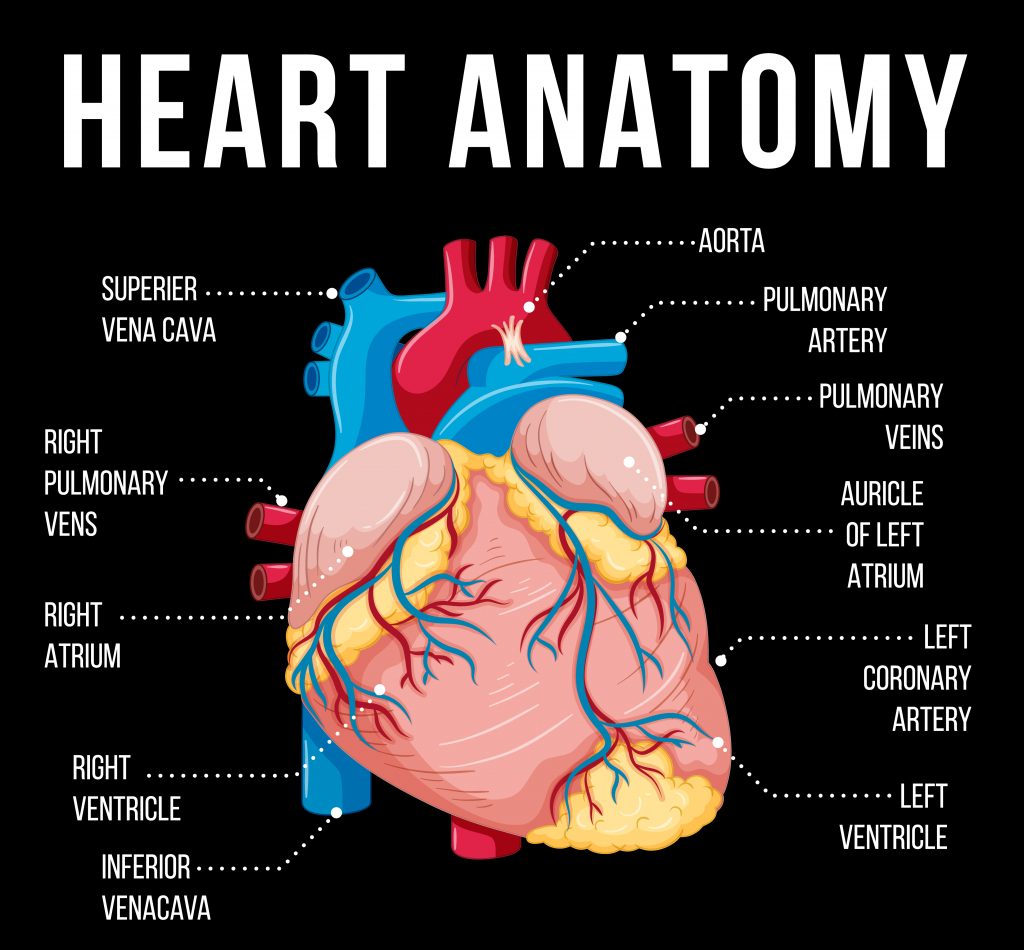
How to Do It:
Refer to the diagram painted above!
Step 1: Decide on a concept you want to study, like the structure of the human heart or the timeline of a historical event.
Step 2: Lightly draw the outline of your concept on a canvas or a large sheet of paper. You could sketch the heart and its parts or a timeline with key events marked.
Step 3: Assign different colors to different parts of your concept. For example, use dark red for the Aorta and blue for Pulmonary artery. For a timeline, different colors could represent different periods or types of events.
Step 4: As you fill in the sketch with colors, reinforce the learning by saying out loud or mentally reviewing what each part represents and how it fits into the larger concept.
Step 5: Hang your artwork in your study area. Every time you see it, you’ll be reminded of what you learned, and the visual representation will help cement the information in your memory.
And there you have it! Transforming your room into a dynamic learning environment isn’t just about making studying fun; it’s about harnessing the power of your brain’s multiple memory systems to enhance your learning experience. By engaging in creative and hands-on activities like mind maps, flashcards, timelines, dioramas, homigrams, songs or poems, doodling, and painting, you’re not only breaking the monotony of traditional study methods but also significantly improving your ability to recall and apply information.
Remember, the key to these strategies is to do them your way. Change up each activity to suit your interests and learning style. Whether you’re someone who loves doodles and paintings or someone who remembers best through stories and rhymes, there’s a method here that can work for you. The more you enjoy the process, the more effective you will remember!
So, next time you sit down to study, think outside the textbook. Look around your room and see it for what it really can be—a vibrant, interactive learning space that not only helps you achieve your academic goals but also makes the journey enjoyable. So, let your walls tell you stories that you will remember forever. Here’s to making learning an adventure that you look forward to every day. Happy studying!

